Installation of standalone python34

STEP1:

Download python34 (python3.4.0 msi)  from following website,
https://www.python.org/downloads/release/python-340/
After you have installed it go to command terminal(cmd) and put this python in your path as first priority
PATH=C:\Python34;C:\Python34\Scripts;%PATH%     (or)
Go to Control Panel -> System and Security -> System ->  Advanced system settings -> environment variables -> system variables -> path and paste C:\Python34;C:\Python34\Scripts;

STEP2:

Download PySide-1.2.4-cp34-none-win32.whl from https://pypi.python.org/pypi/PySide/1.2.4
In the cmd, cd into the directory where PySide-1.2.4-cp34-none-win32.whl is present and run,
pip install PySide-1.2.4-cp34-none-win32.whl

STEP3:

Download spyder2.3 from https://pypi.python.org/pypi/spyder/2.3.0
In the cmd,
cd spyder-2.3.0
python setup.py install
should install your spyder in the python setup.

STEP4:

Download pyinstaller from https://pypi.python.org/pypi/pypiwin32/219
in the cmd,
pip install pypiwin32-219-cp34-none-win32.whl

STEP5:

Download pyinstaller from https://github.com/pyinstaller/pyinstaller/releases
In the cmd,
cd PyInstaller-3.1.1
python setup.py install

STEP6:

Download xlrd package from  https://pypi.python.org/pypi/xlrd/0.9.3
In the cmd,
cd xlrd-0.9.4
python setup.py install

STEP7:

Download pyglet package from https://pypi.python.org/pypi/pyglet/1.2.3
In the cmd,
pip install pyglet-1.2.3-py3-none-any.whl

STEP8:

Download psutil( download exe since .whl file didn’t work ) from https://pypi.python.org/pypi/psutil 
and run it.
Note:
If you encounter an error saying,
return psutil.phymem_usage().percent AttributeError: ‘module’ object has no attribute ‘phymem_usage’
Open the system.py file:
C:\Python34\Lib\site-packages\spyderlib\utils\system.py
In that file, replace return psutil.phymem_usage().percent line with
return psutil.virtual_memory().percent
StemLand-Name Board

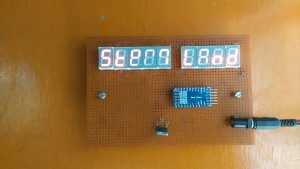
At first the children did a seven segment display(SSD) board which displays StemLand on it by lighting it up using a 9V battery using a corresponding resistor in series. After that we(Anishvathi,Sangeetha,Praveen,Sharmila,Fevina- 8th Grade Students) properly soldered the SSD on a pcb board . We wanted to make the ssd to light up in various ways. So, we used an arduino pro-mini to program the SSD to blink in various ways .We used a battery which was 9V but if we had given the 9V directly it would burn out the arduino board and the SSD.So, we used a 5V voltage regulator which will give us 5V at the output from a 9V input from the battery. Where the output of the regulator is fed to the input of the arduino board. The board worked smoothly. After a few days the battery discharged so we had to change a new battery .

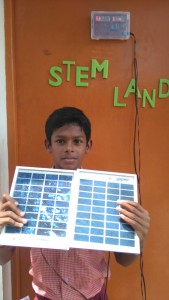
Then Sanjeev gave an idea to make it work using the solar panel . At first Praveen (Student form 8th Grade) and I used one solar panel which did not have enough current to light up the SSDs.So, we used two solar panels in parallel and we got enough current to light up the SSD. Now the board runs in solar energy from the solar panel.

DSC_0708

DSC_0715(Praveen holding the solar panel and displaying how it works)

There is also more detail about this Name Board in the link below

http://www.auraauro.com/showcase/name-board-of-stem-land/


Syringe Generator

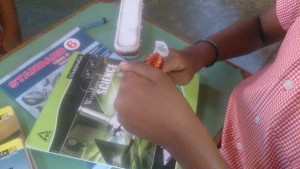
The syringe generator from Arvind Gupta’s Toys was made by few students in the 6th grade. They got the required materials; syringe, enamel wire, Neodymium magnets, and a LED. The children saw the video and came up with their own syringe generator. They also noticed that the led only blinks when the magnet hits one end of the syringe every time they shook it.

DSC_0135 DSC_0136 DSC_0138